I was hoping to have this done last night, but it took me longer to write than anticipated. There were also lots of pictures taken before, during, and after the bathroom renovation that I had to go through to pick out the ones I wanted to use.
Before we get to the pictures, though, I should probably go over how this project came to be for those of you who may have missed the June 28th post when I first mentioned this, and for those of you who may want to reread it. Instead of directing you back to that post to read it, here is what I wrote, word for word:
“As some of you may know, Stacy has been a Thirty-One Gifts consultant for the past six months or so, trying to make a little extra money to help out with our finances. In February, a woman was trying to buy a bag through the Thirty-One website and was having some issues. The woman contacted Thirty-One who then directed her to a consultant in her area, which happened to be Stacy. Stacy helped her complete her order, and as they were talking, the woman mentioned that she and her husband own a home remodeling company.
Let me back up for a second here. James is currently about 40 pounds and 4 feet long. Stacy is 5’9” and I am 6’2” so the odds are pretty good that he is going to be tall, too. We currently bathe him in the bathtub in the bathroom across the hall from his bedroom, but at some point, getting him in and out of the bathtub is not going to be feasible because of his size. For the past several months we have been discussing and researching options of what we could do to make bathing James easier. We came across a lot of possibilities, but very few of them looked like they would work for the space we had available, or our budget.
Back to the story…
When Stacy found out that the woman she was helping with her Thirty-One order happened to be in the home remodeling business, she took the opportunity to ask a few questions about making a bathroom more accessible for James. As it turned out, the woman lives less than five minutes away from us and has the same style house that we do. She and her husband came over and discussed options with us and gave us some rough estimates on cost, all of which were out of our current price range. We thanked them for their time and told them that we would need to discuss the options they presented, and figure out what we could afford to do. A few weeks later Stacy got a call from the woman with some unbelievable news.
Their remodeling company is a member of the Greater Chicagoland chapter of the National Association of the Remodeling Industry, which occasionally does special projects for families in need. At their March association meeting, the woman and her husband brought up our bathroom dilemma. The association board voted in favor of taking on our project…at no cost to us! Are you freaking serious?!”
Yep, they were serious. All of the materials and supplies were donated. Everyone who worked on the renovation did so on their own time, so I guess you could say that the labor was donated, too. As you will see in the pictures below, this was not a small project. They completely gutted the bathroom down to the studs; moved a wall out about a foot to make room for roll-in shower; removed the concrete slab under the shower area so that they could pour new concrete and pitch it towards the drain; moved the linen closet so that they could use that space for the shower; and had to rework some of the plumbing and electric.
I’ll start with some before pictures, then throw in some pictures taken during the renovation, and finish with our new bathroom. I’ll also include a couple of before and after collages that Stacy put together so you can really see how different our bathroom is.
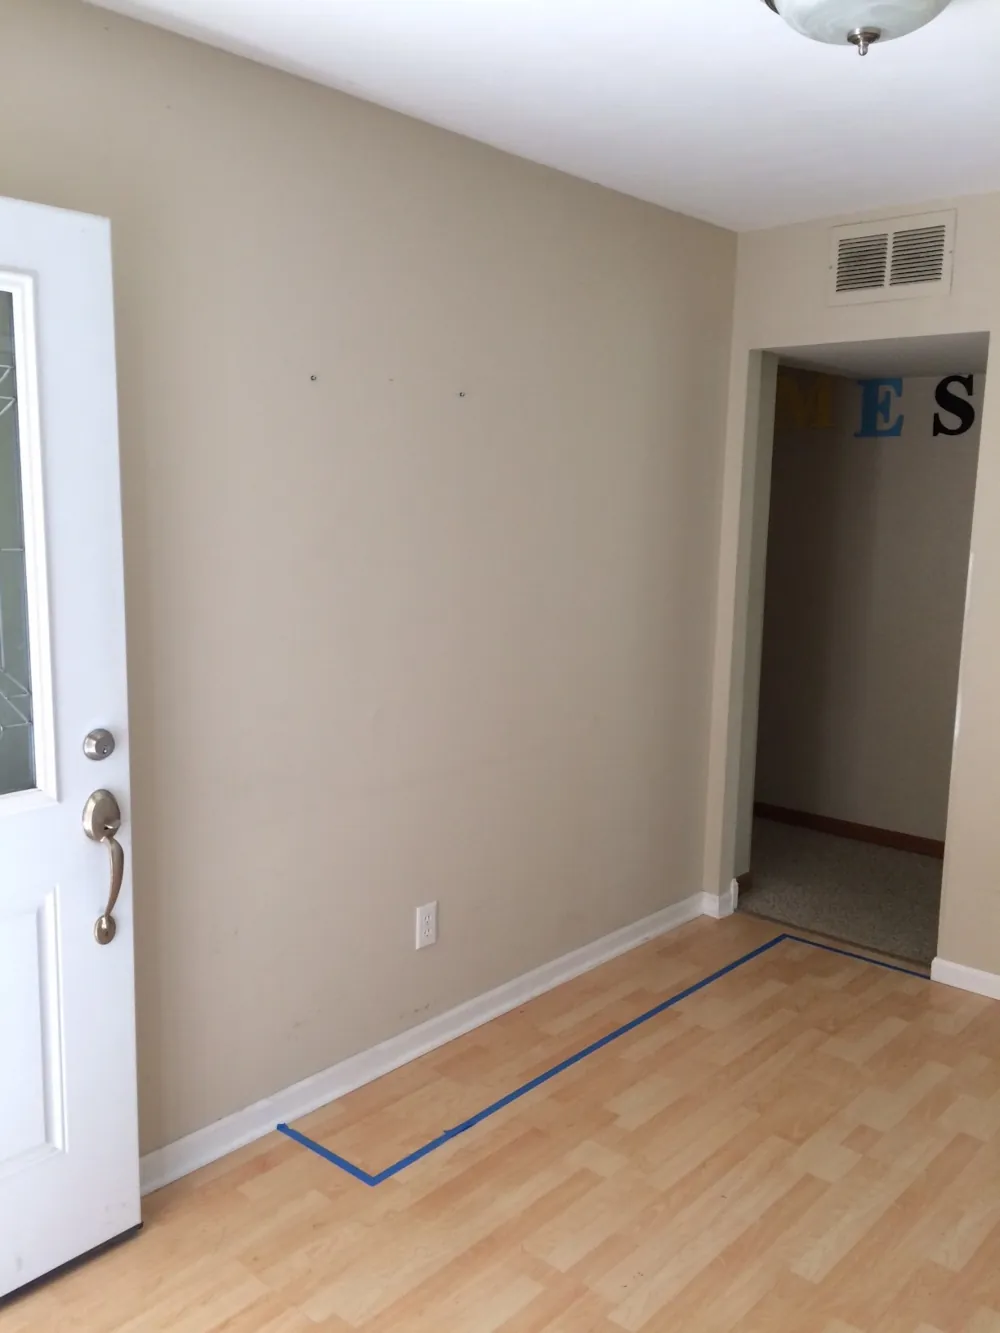
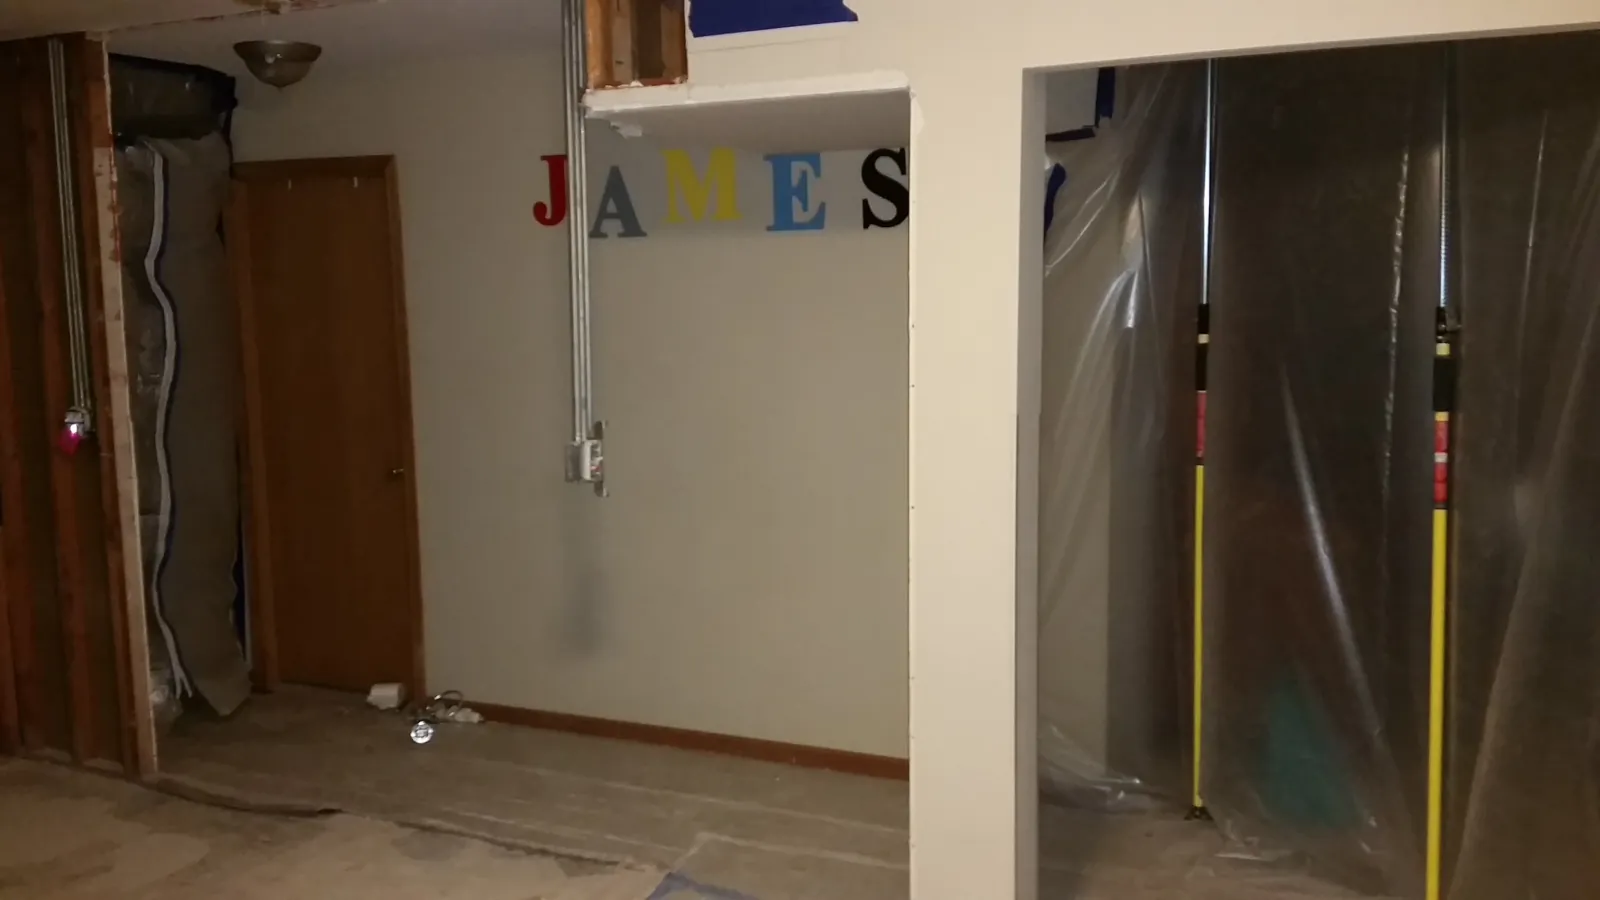
This is a picture of our entryway inside the front door. The bathroom is on the other side of that wall. The blue tape on the floor is where they planned to bump out the wall to make additional room for the shower.
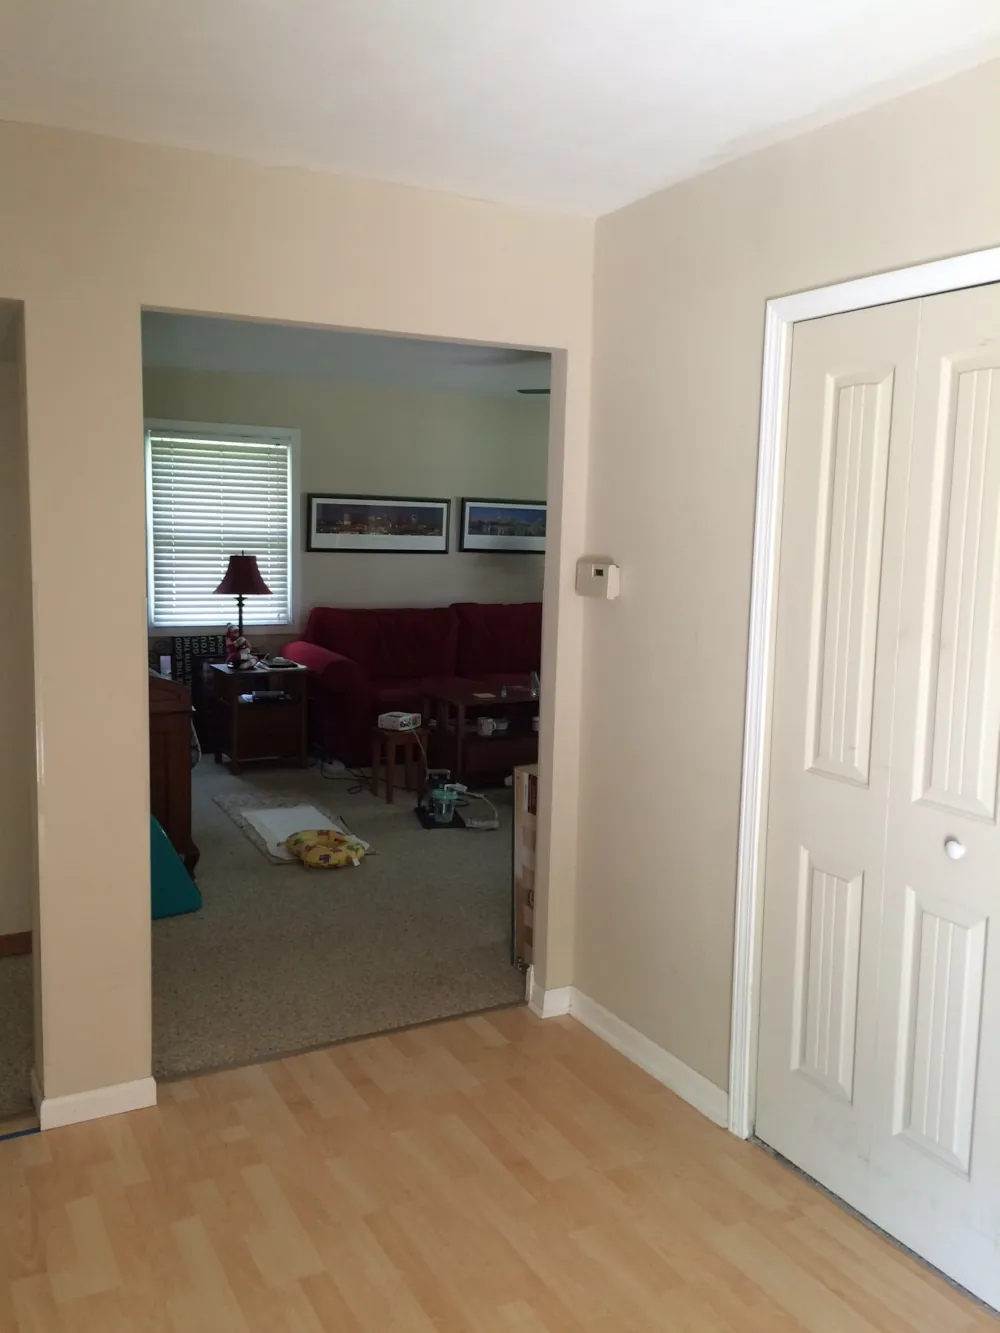
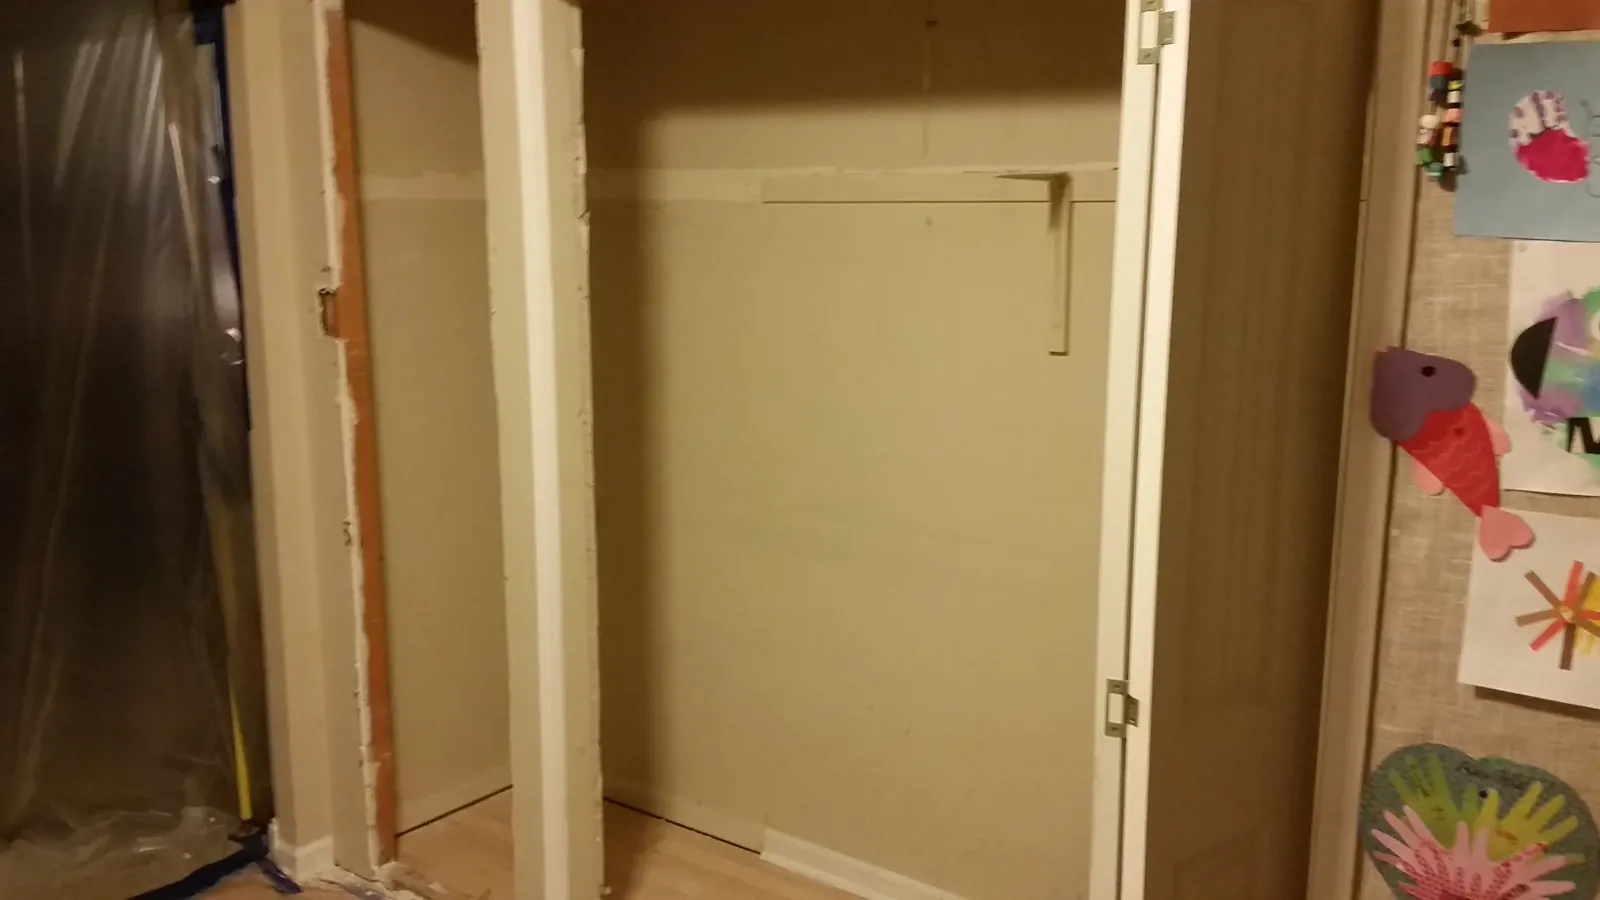
On the opposite wall of the entryway is the front closet. Behind the wall to the left of the closet doors is storage space that is accessible through the closet. Because we would be losing our linen closet as part of the bathroom renovation, they built us a new closet for our linens in that space. The thermostat for the air conditioner and furnace was relocated into the living room.
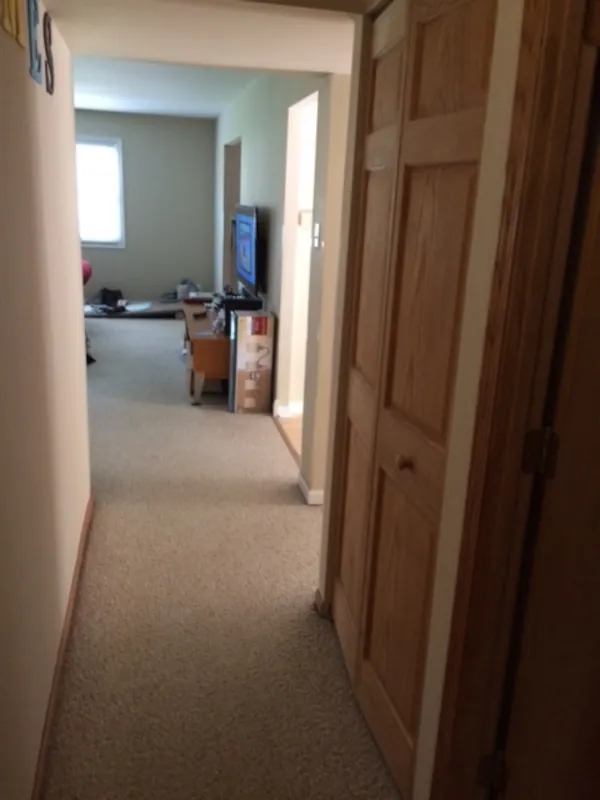
This picture was taken from the hallway between the bathroom (on the right) and James’ room (on the left) looking towards the living room. You can see a little bit of the door to the bathroom that was renovated. The wooden bifold door is where our linen closet used to be, and just beyond that is the entryway on the right.
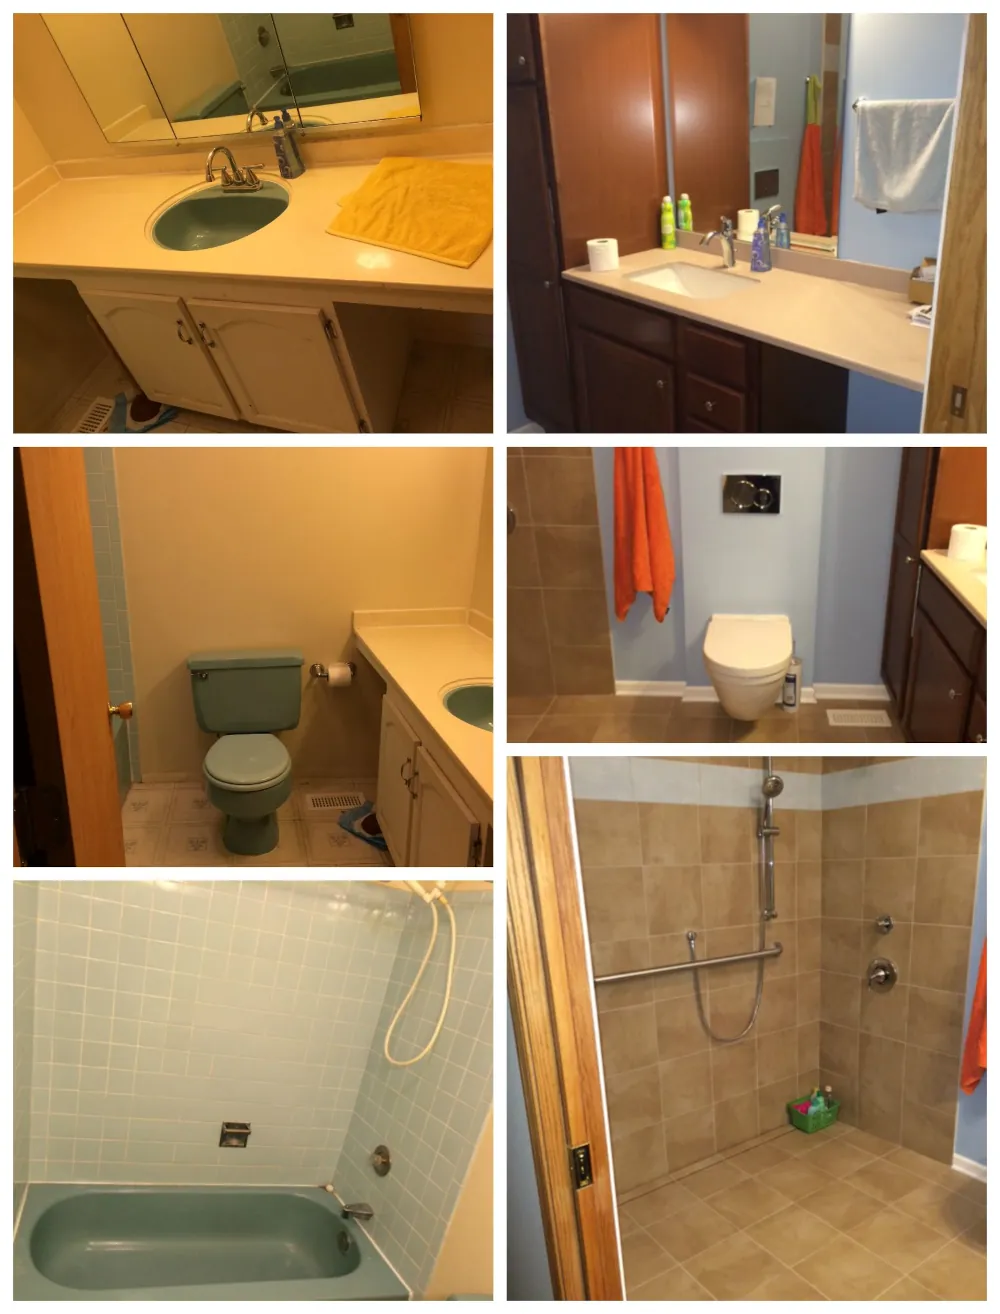
This is what our bathroom used to look like:
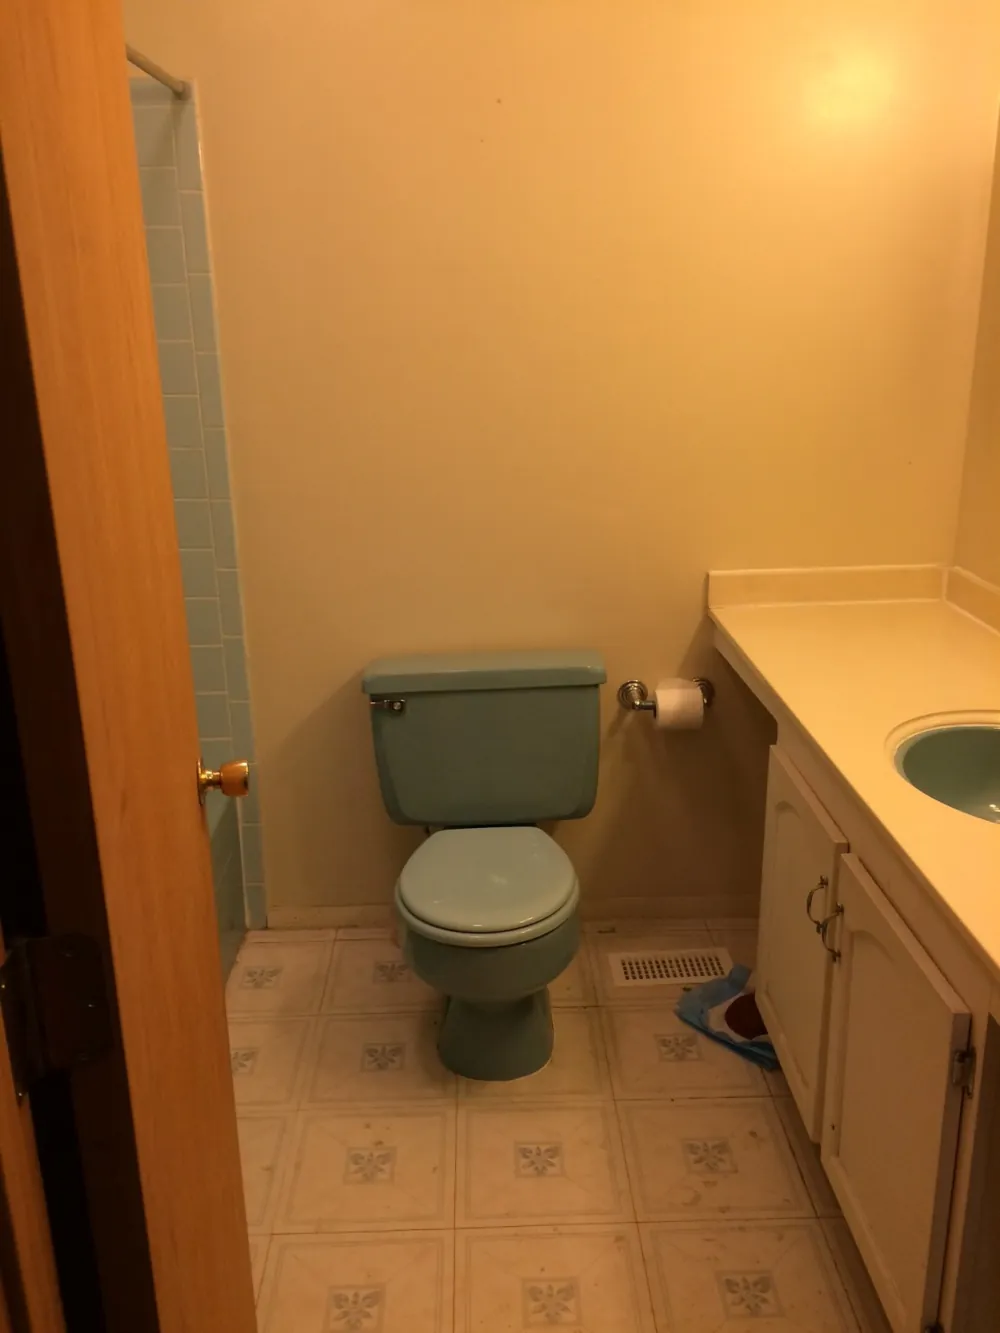
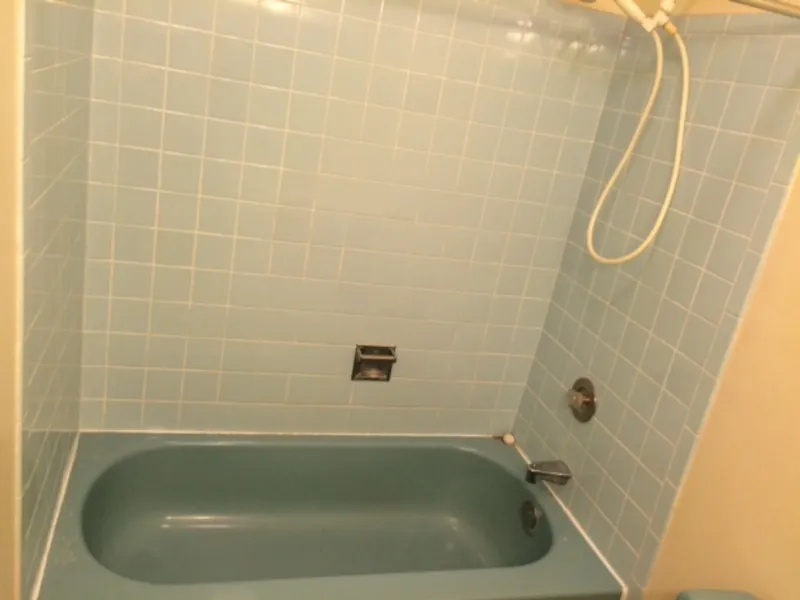
The linen closet that I mentioned earlier? It came into the bathroom and is behind the wall to the left of the tub:
That was a nice 1970s retro bathroom, huh? Not anymore! Let the demo begin!
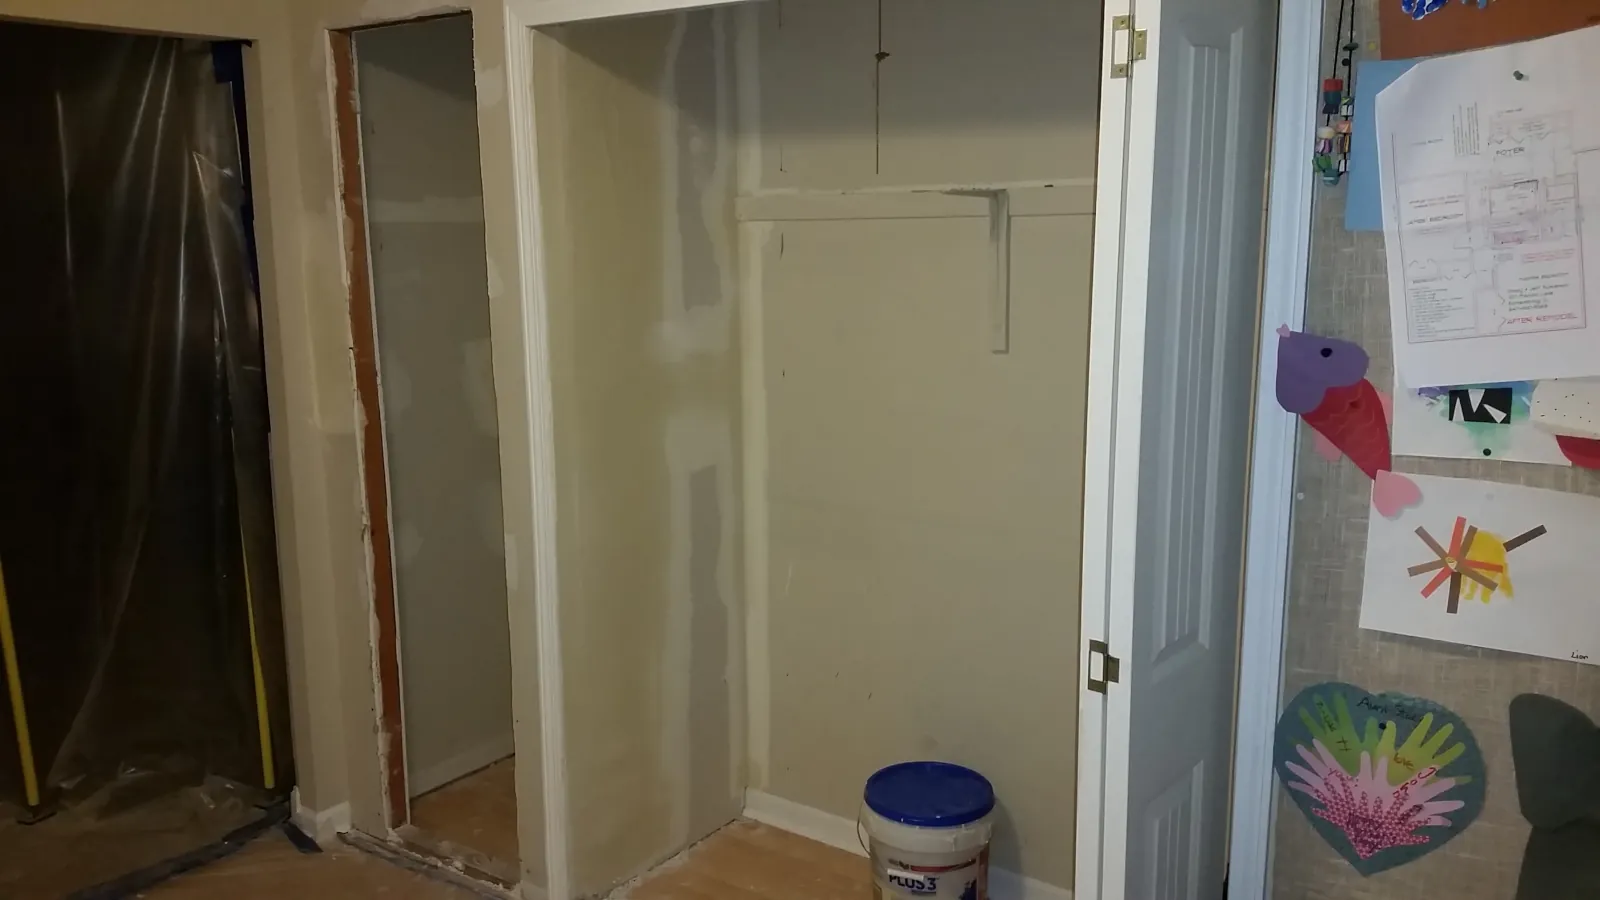
As I mentioned previously, part of the renovation included relocating the linen closet into the entryway closet. Here they’ve carved out the doorway for the new linen closet:
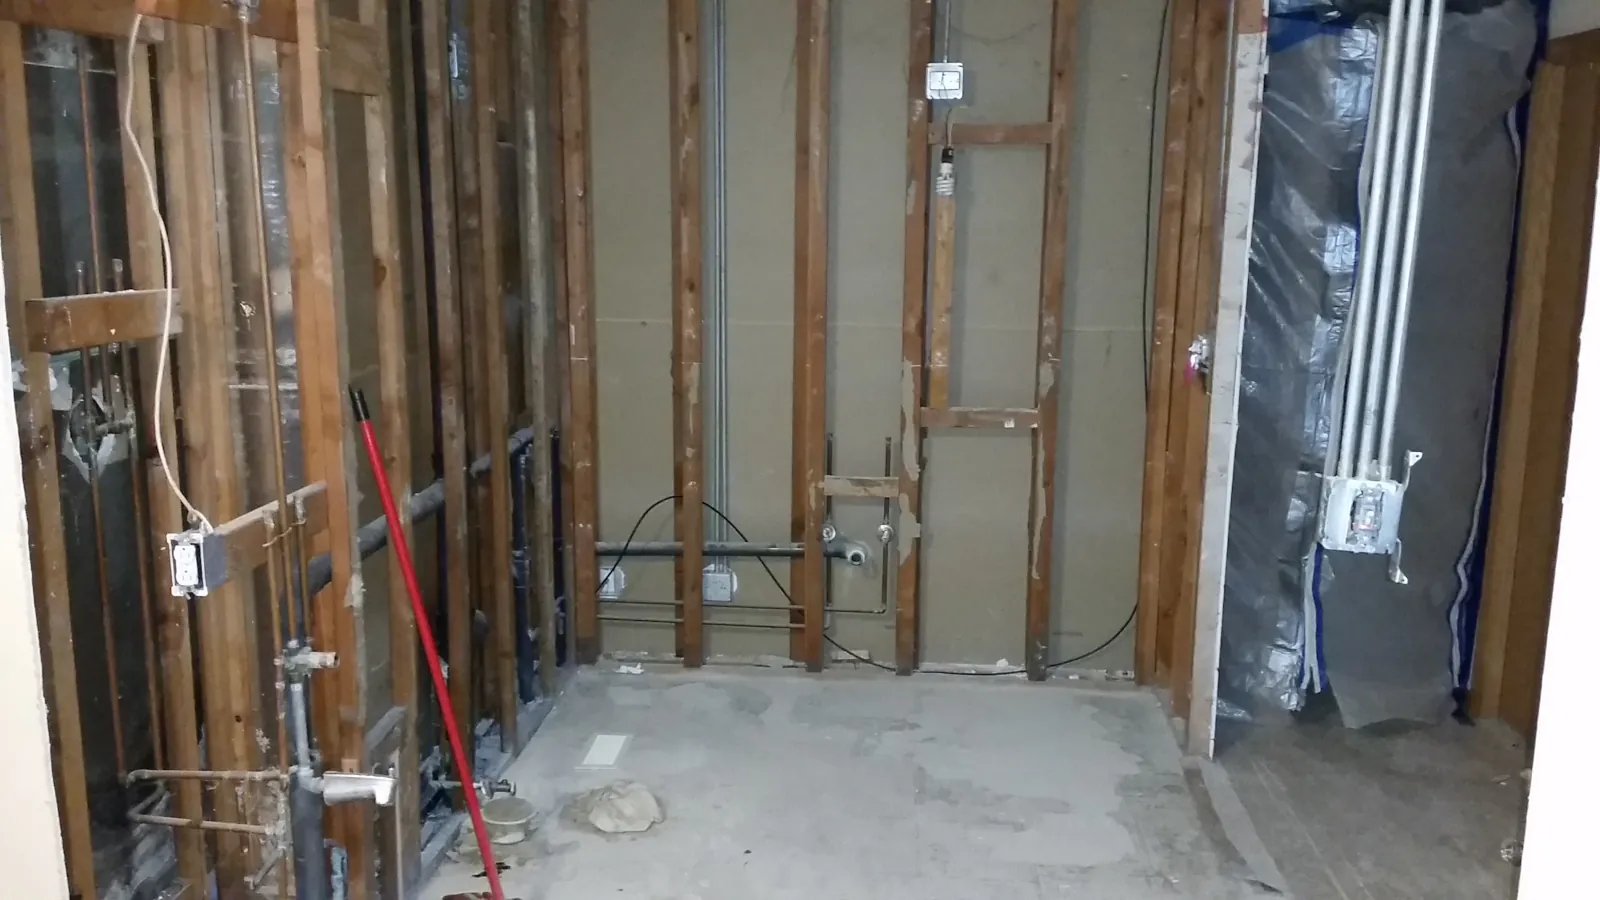
This picture was taken from the entryway. The walls between the entryway and the bathroom and between the bathroom and the hallway have been removed:
Another picture taken from the entryway, and you can see that bathroom has been completely gutted down to the studs:
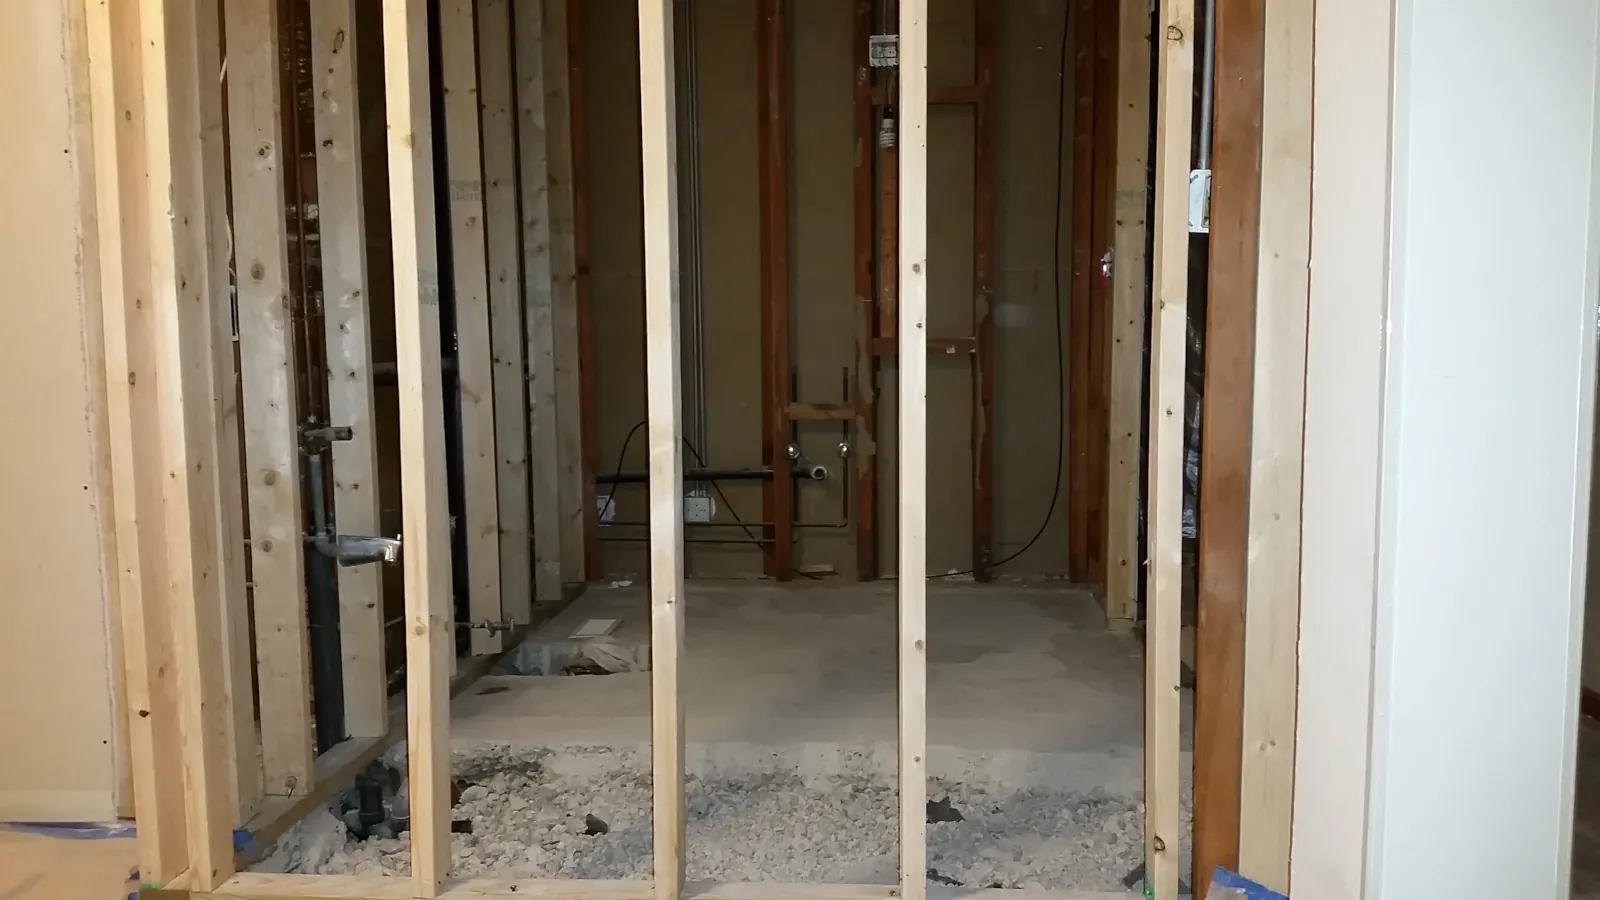
Here you can see where they framed out the new wall that comes out a food into the entryway. You can also see where they removed the concrete where the tub used to be:
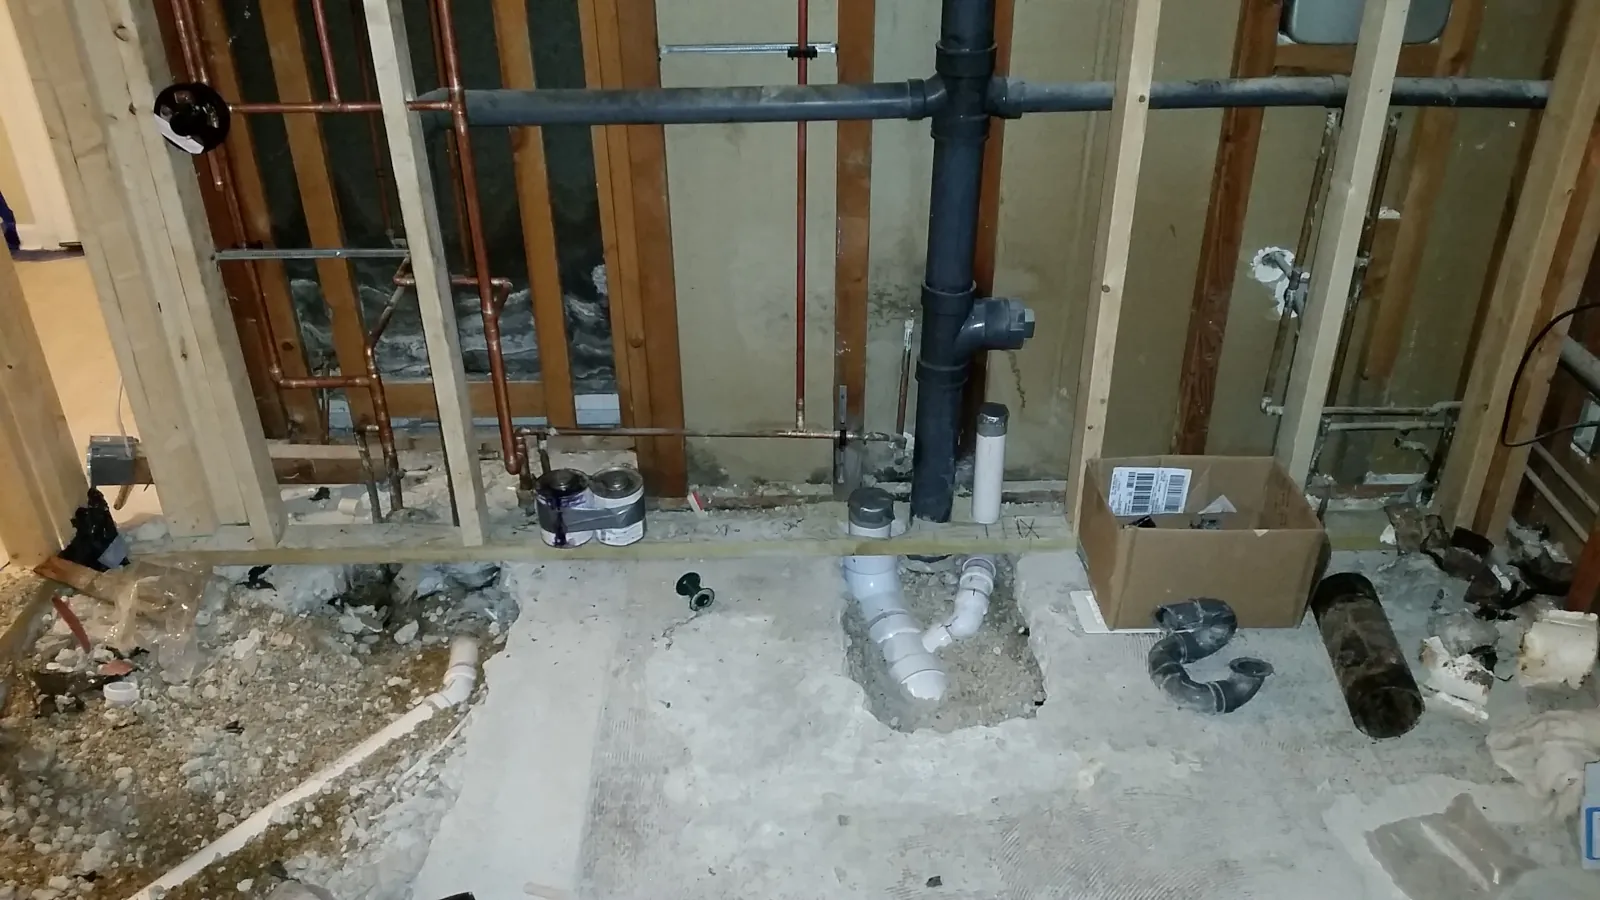
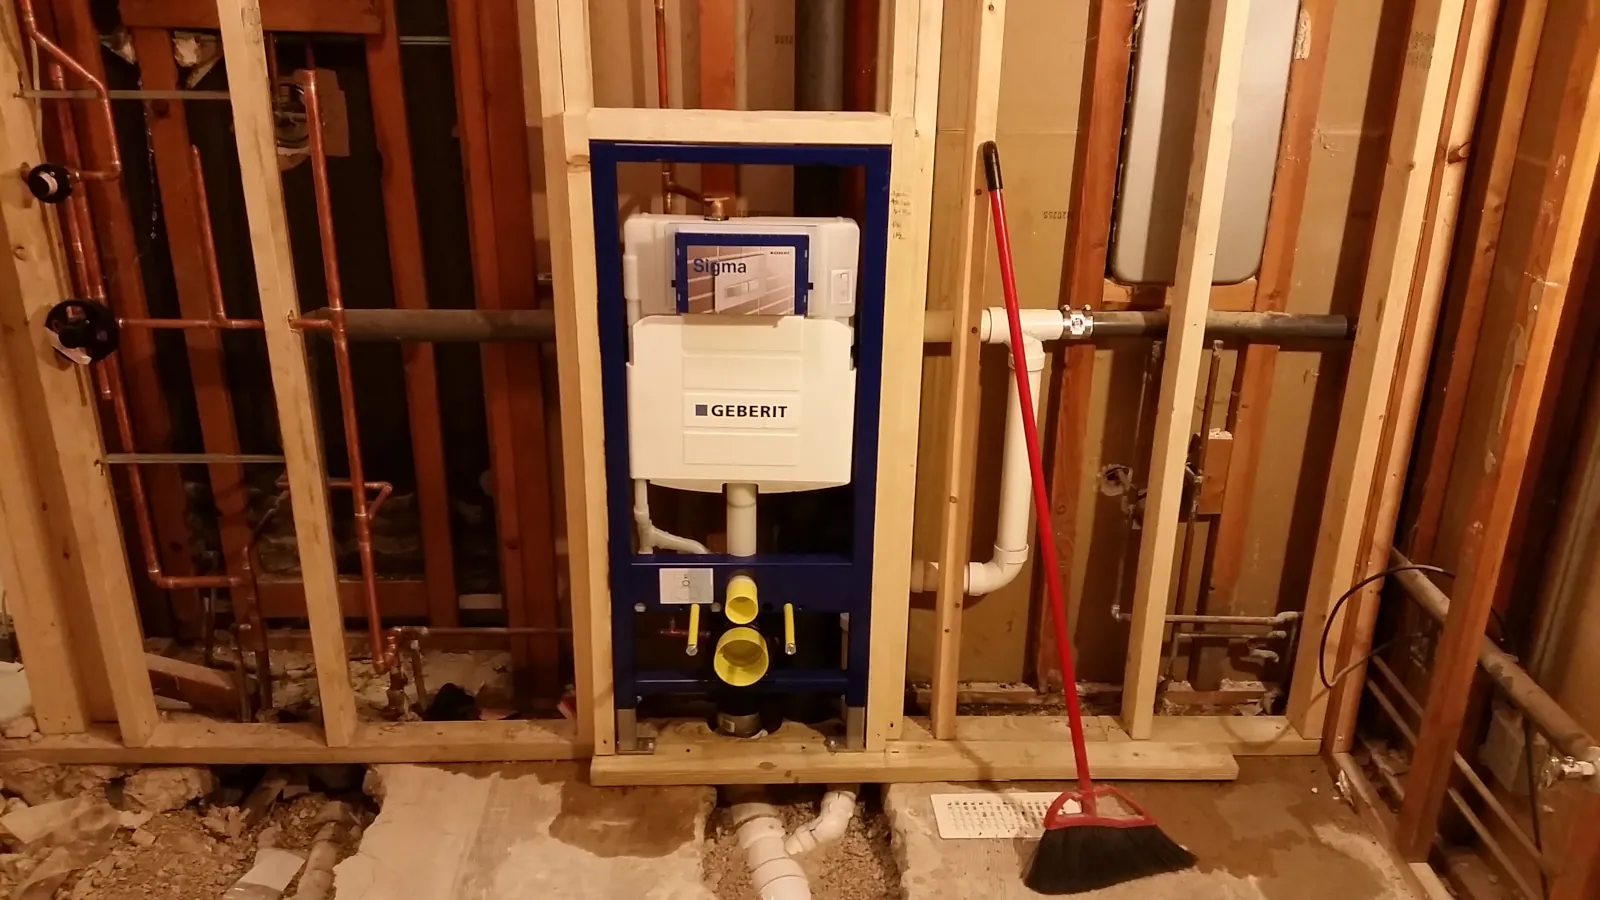
New drainpipes installed for the toilet:
New toilet tank installed. Some of you will probably be scratching your head once you look at the picture. The tank for the toilet is actually mounted inside the wall. It will probably make more sense when you see the finished bathroom pictures.
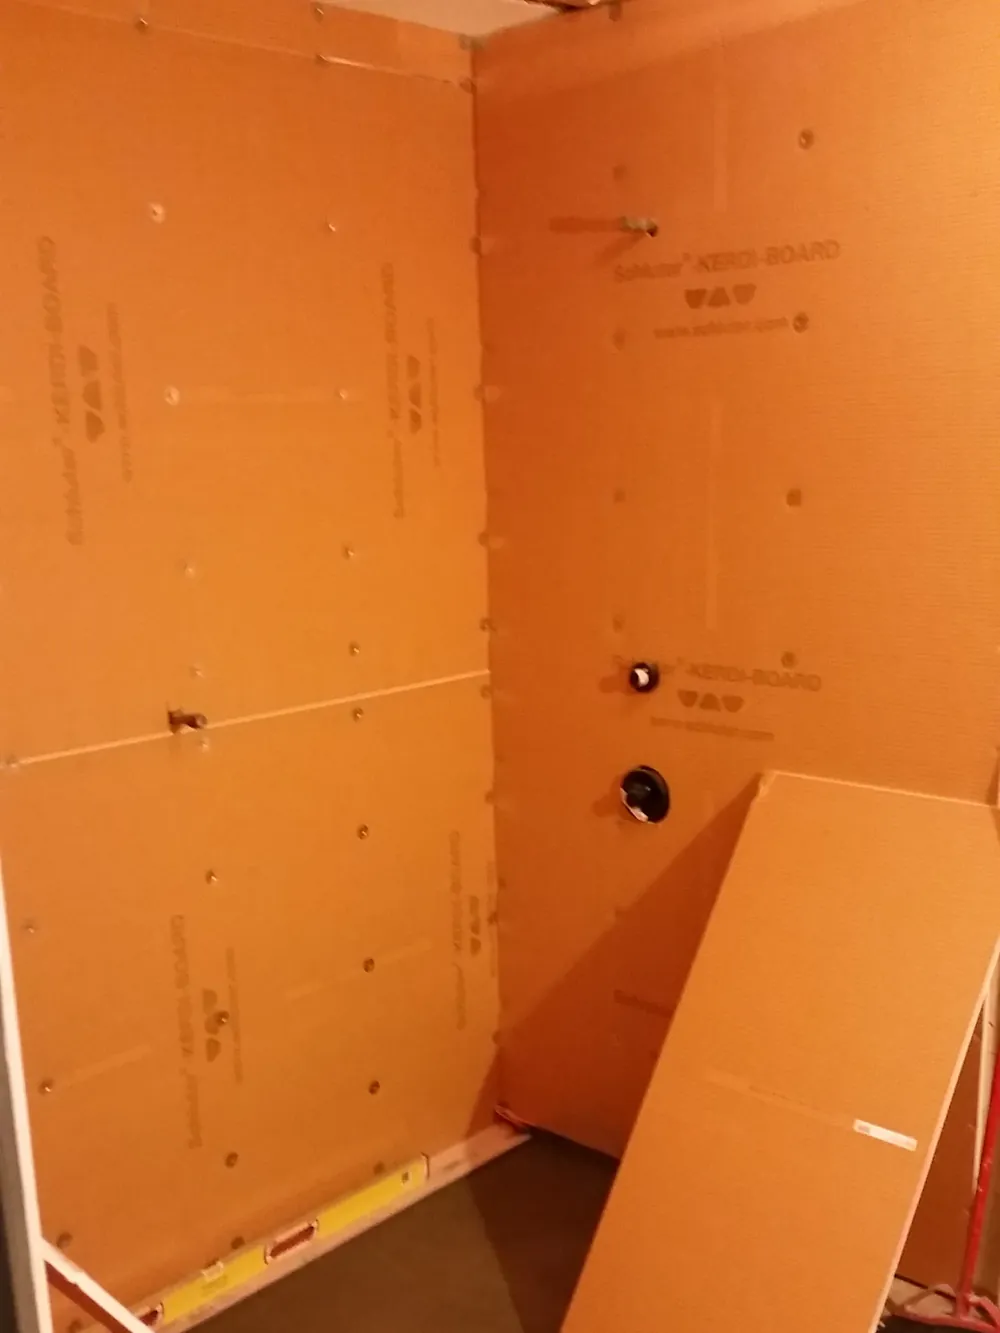
New concrete poured and walls put up for the shower:
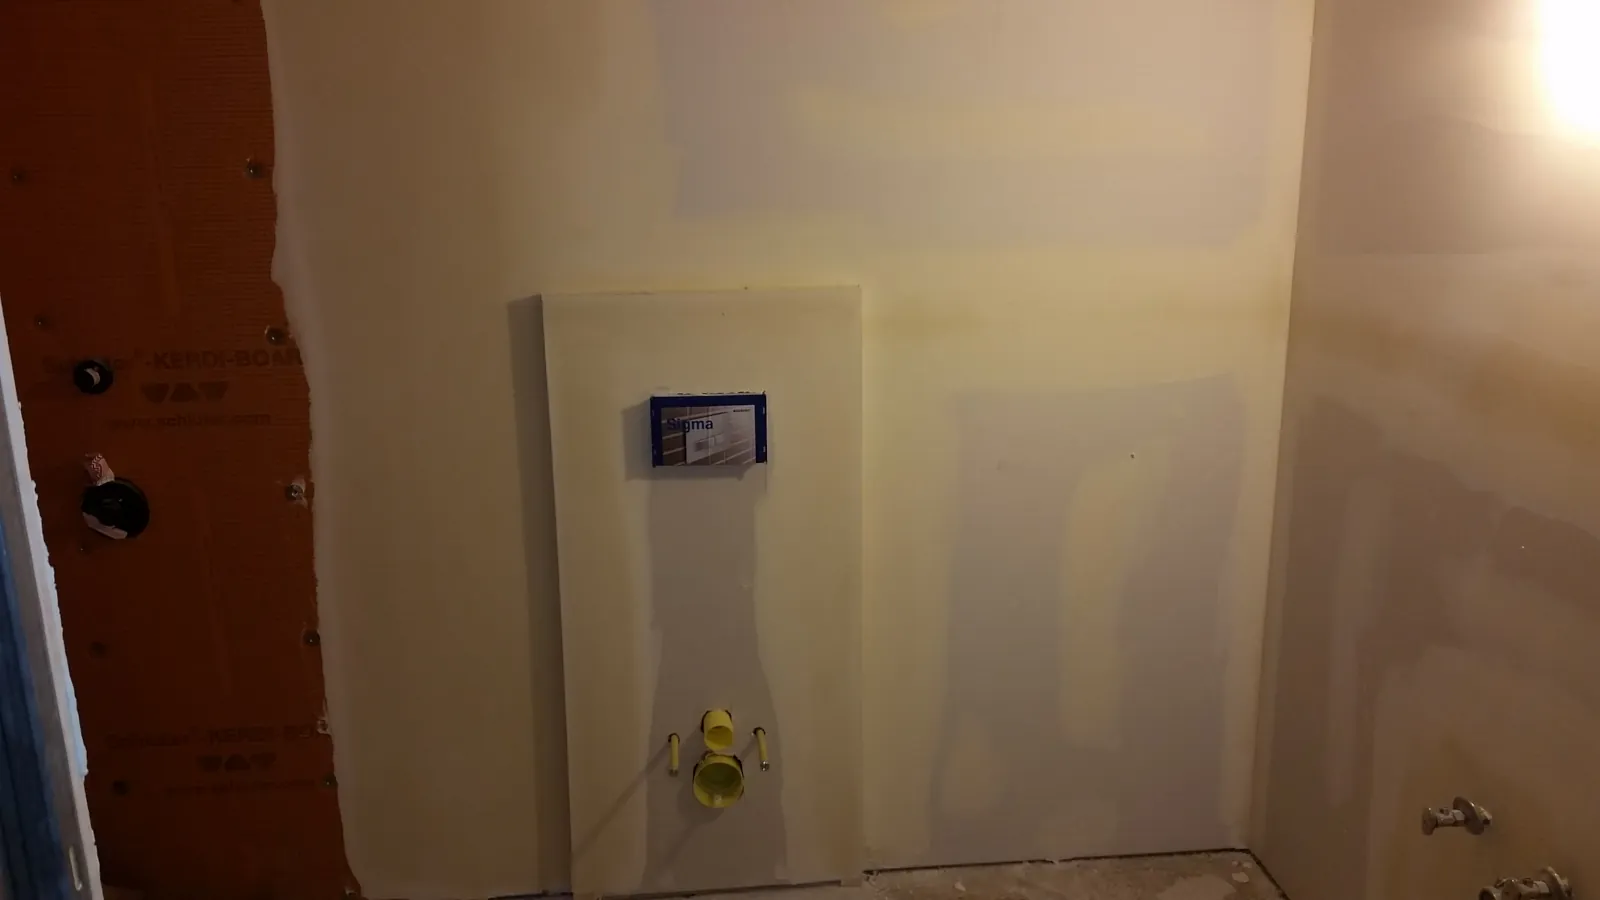
Walls put up in the rest of the bathroom. You can see how the toilet tank is concealed behind the wall.
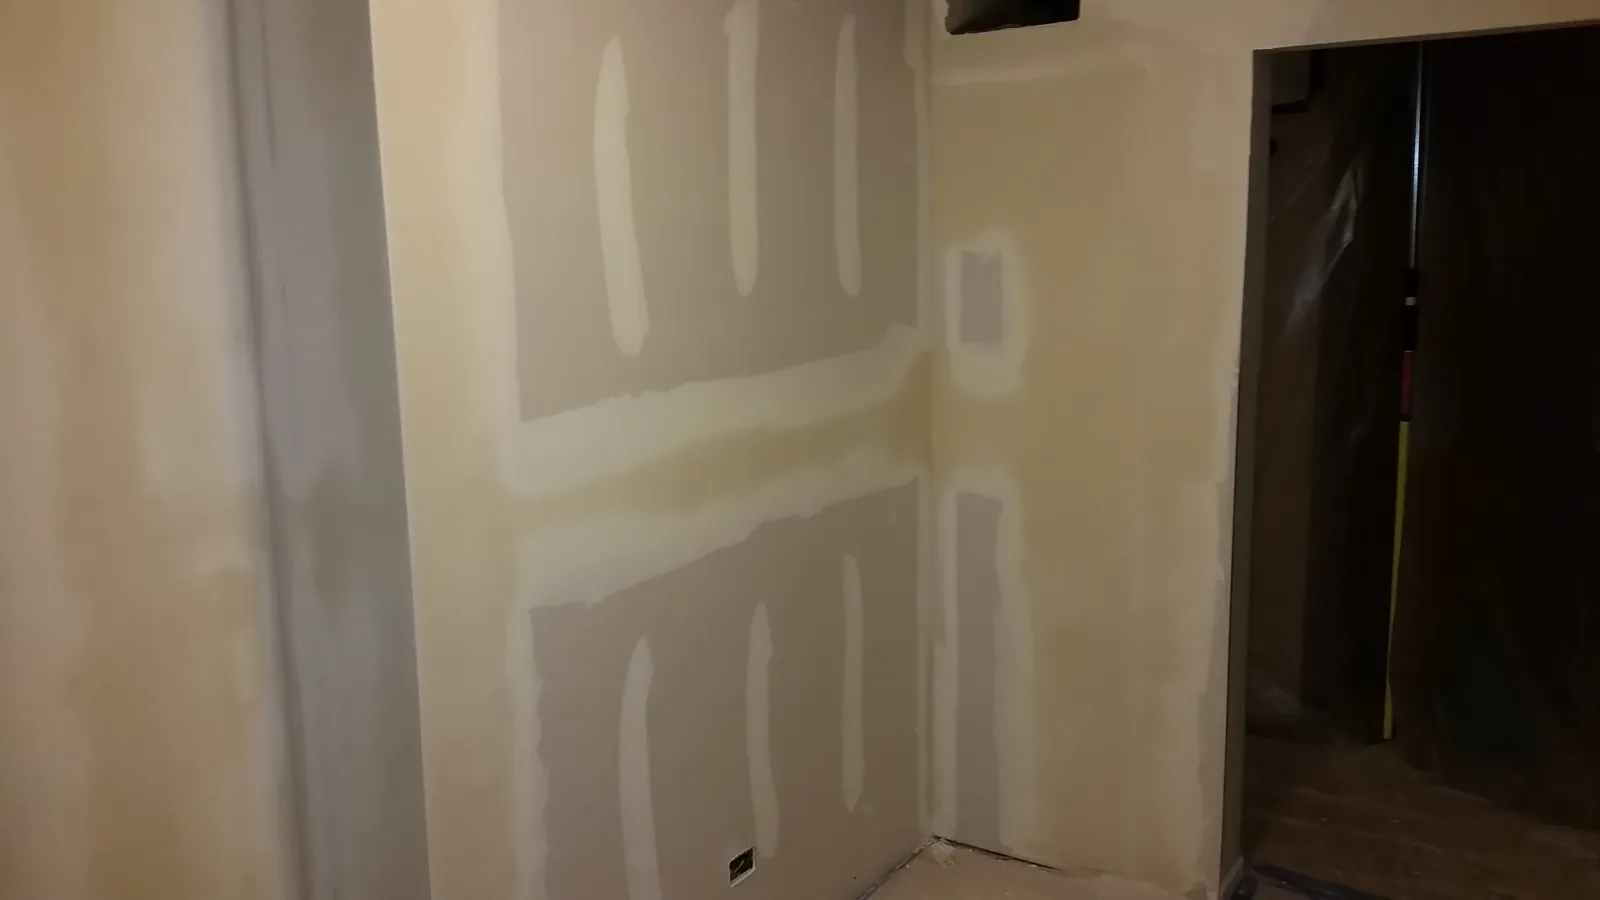
Here’s are a couple of pictures of the entryway where you can see the new wall that they put up for the bathroom as well as the new linen closet:
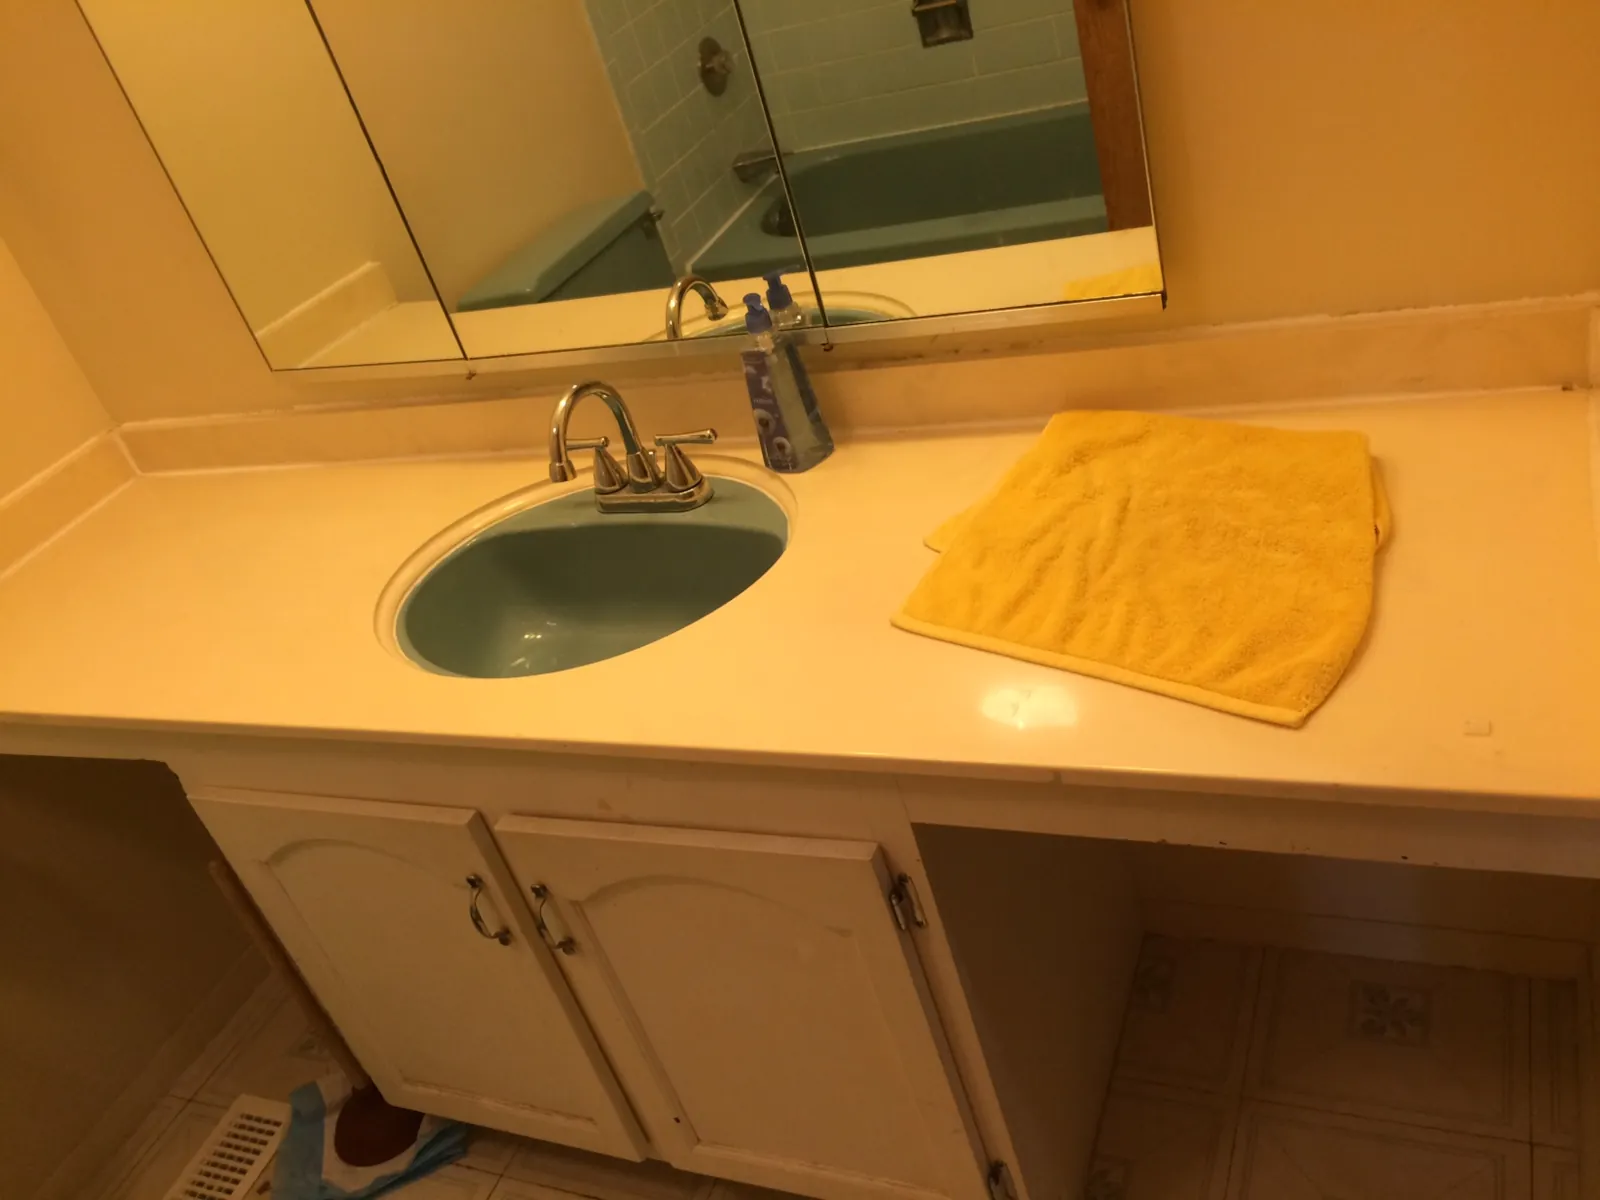
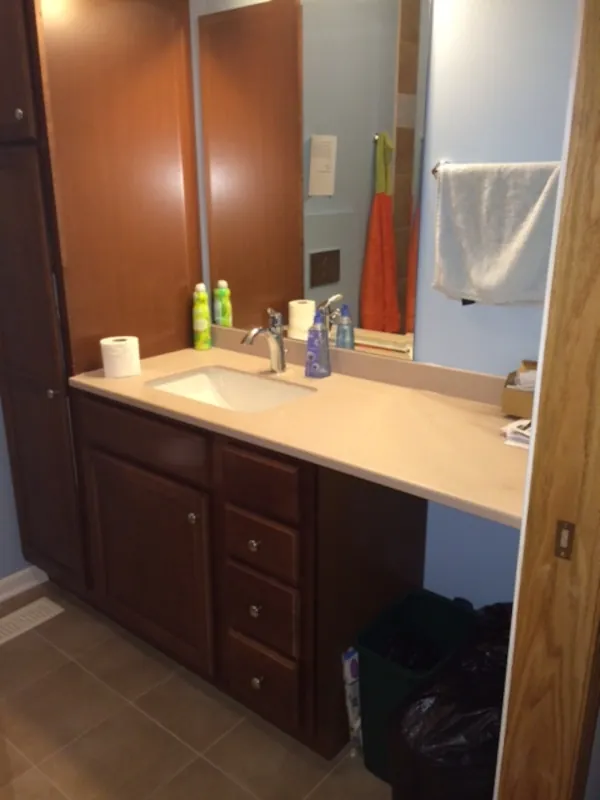
Alright, are you ready to see pictures of the finished bathroom? It is frickin’ amazing!
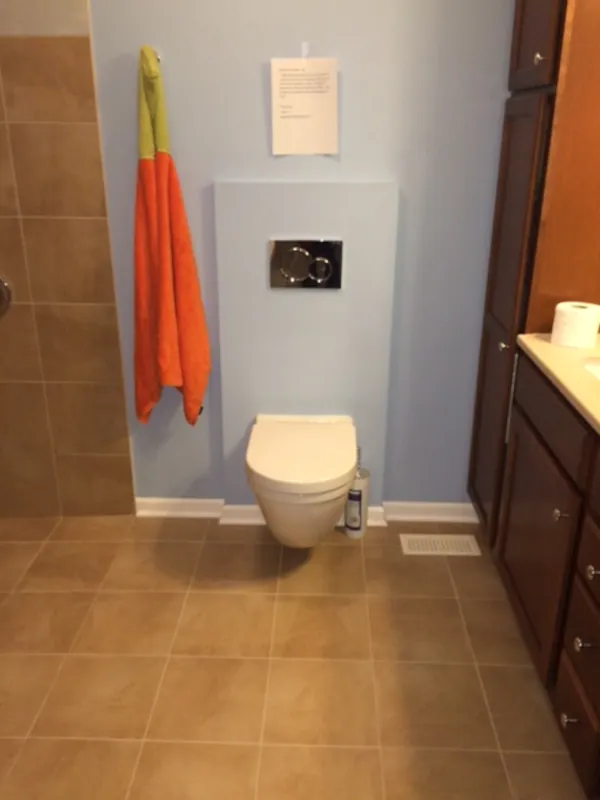
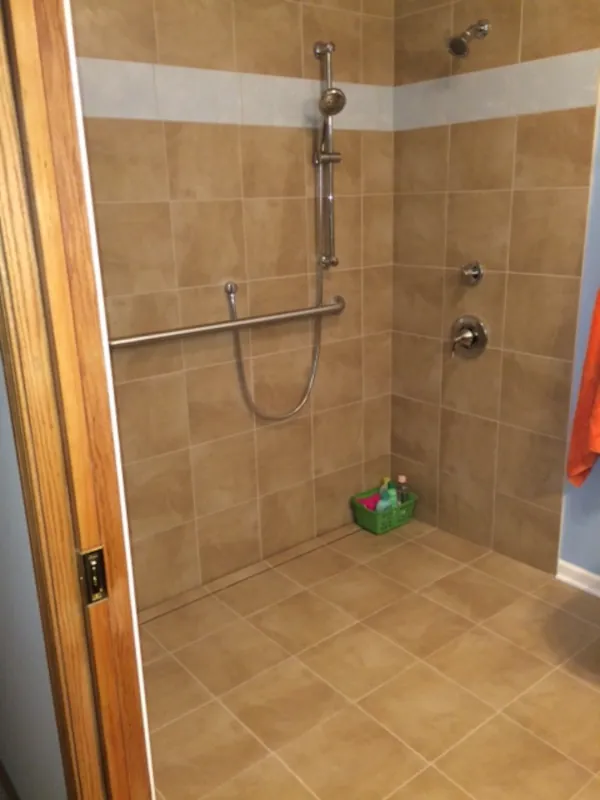
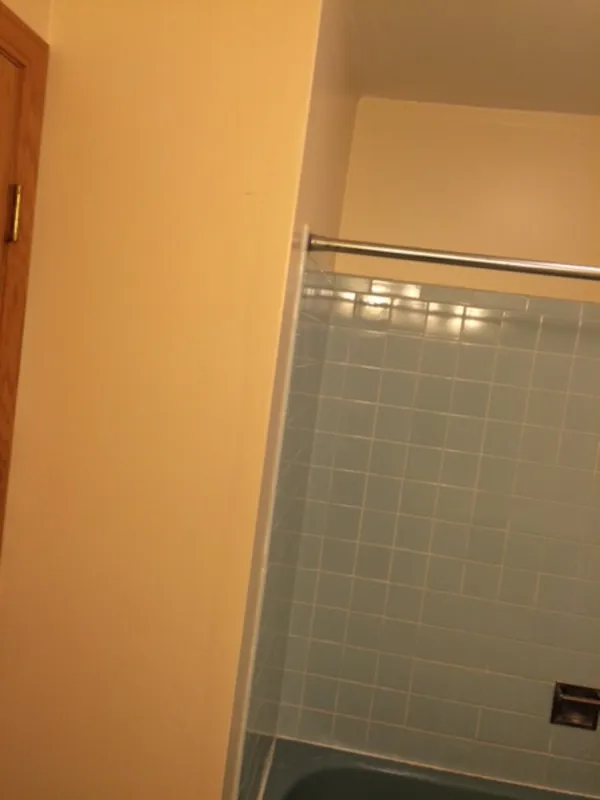
They also made the doorway to the bathroom wider and put in a pocket door that slides into the wall instead of a normal door that would swing into the bathroom. You can see the door slid into the wall in the last picture above. Also in the last picture, if you look closely, you may be able to see a dark line on the floor going left to right just in front of the back wall. That is the drain. The floor of the shower has a slight pitch towards the back wall where it goes down into that dark crack, into a trough, and down the drain.
This is a completely different bathroom. I mean, look at the side-by-side pictures below:
Here are a couple of pictures of James getting his first shower in his new bathroom:


We are just completely blown away. When Stacy and I had past discussions about making an accessible bathroom with a roll-in shower for James, I don’t think either one of us envisioned a bathroom like this. This is beyond what we ever imagined. We are extremely grateful for the generosity of all those involved that made this happen.
You know that old saying, “it’s not who you are, it’s who you know”? Maybe this was a little bit of both. If Stacy didn’t want to try to earn a little bit of money in her spare time to help us out financially, she would have never thought about becoming a Thirty-One consultant. And had she not become a Thirty-One consultant, her path would not have crossed with Donna’s, the woman who was having issues with ordering an item on the Thirty-One website, and who just so happened to own a remodeling business with her husband.
Or maybe this was just a case of being in the right place at the right time. Whichever powers of the universe made Stacy and Donna cross paths, we are forever grateful. A HUGE thank you to the Greater Chicagoland chapter of the National Association of the Remodeling Industry for approving this project and to everyone who donated the material and their time to make this happen!
